How to Make Your YouTube Videos Sound More Cinematic: 12 Pro Audio Tips
Spatial9 Team · · Updated
Viewers forgive a slightly soft picture. They do not forgive bad sound. Audio is what separates a video that feels like a home recording from one that feels like a film. The good news is that most of what makes film sound "cinematic" is technique, not expensive gear. This guide walks you through it step by step.
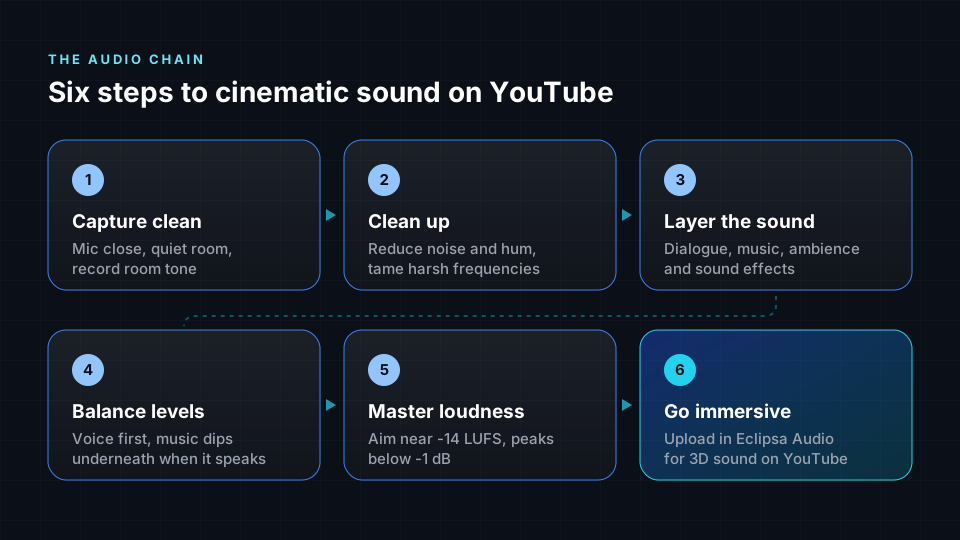
Step 1: Capture clean sound
Everything starts at the microphone. No amount of editing can fully rescue a noisy, echoey recording.
1. Get the microphone close
The closer the mic is to the speaker, the more voice and the less room you capture. A small clip-on microphone or a shotgun mic just out of frame will almost always beat the camera's built-in microphone.
2. Choose a quiet, soft room
Hard, empty rooms create echo. Rugs, curtains, sofas and bookshelves absorb reflections. Switch off fans and fridges where you can, and record away from windows and traffic.
3. Record room tone
Before or after each scene, record thirty seconds of the room with nobody speaking. You will use it later to fill gaps smoothly, a trick film editors use on every production.
Step 2: Clean up the dialogue
4. Reduce noise gently
Use a noise reduction tool to remove steady hiss, hum or air conditioning. Go easy: too much makes voices sound watery and robotic. Removing a little noise from a good recording beats removing a lot from a bad one.
5. Shape the voice with EQ
Roll off very low rumble below the voice, reduce muddy or boxy frequencies, and tame any harsh, sharp tones. The goal is a voice that sounds natural, warm and clear, not bright or thin.
6. Control the dynamics
A compressor evens out loud and quiet words so your viewer does not keep reaching for the volume. A de-esser softens sharp "s" sounds. Apply both lightly.
Step 3: Layer the sound like a film
This is where videos start to feel cinematic. Films are built from layers, each with its own job.
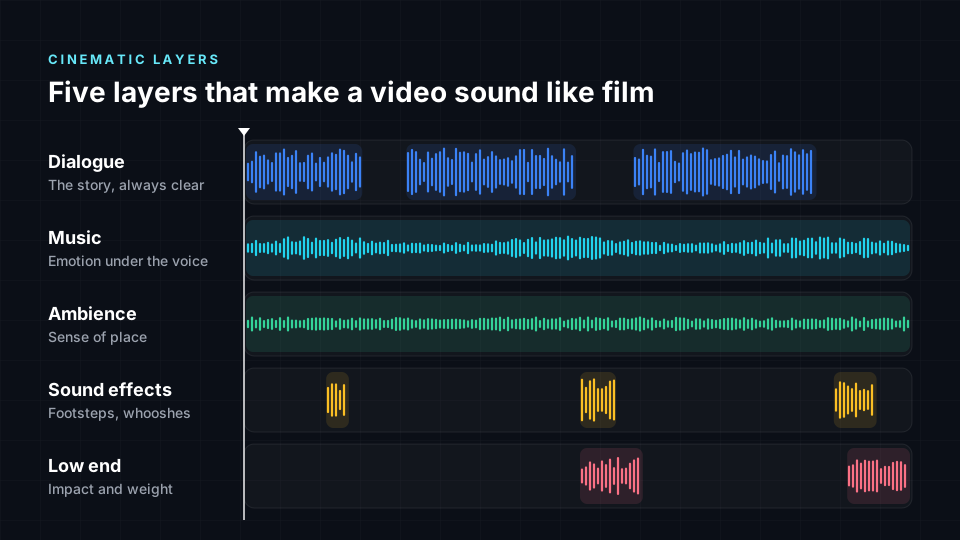
| Layer | Its job | Quick tip |
|---|---|---|
| Dialogue | Tells the story | Always the clearest, most important layer |
| Music | Sets the emotion | Sits under the voice and rises in the gaps |
| Ambience | Makes the place feel real | A quiet bed of wind, city or room sound under every scene |
| Sound effects | Adds detail and movement | Footsteps, doors, whooshes on transitions |
| Low end | Adds weight and impact | Subtle hits and rumbles on big moments |
7. Never leave silence empty
Real places are never silent. A soft layer of ambience under every shot, plus your room tone in the dialogue gaps, instantly makes a video feel more expensive.
8. Use sound effects to connect shots
A whoosh on a cut, the sound of a door before we see the room, or an ambience that starts a second before the picture changes all make edits feel smooth and intentional. Film editors call these sound bridges.
Step 4: Balance the levels
9. Make the voice the boss
Dialogue first, everything else second. When someone speaks, lower the music underneath, then raise it again in the pauses. Many editors call this ducking, and most editing apps can do it automatically.
Step 5: Master the loudness
10. Aim for around -14 LUFS
YouTube adjusts the volume of loud videos so viewers are not blasted between clips. It is widely reported to normalise playback to around -14 LUFS, a measure of overall loudness.
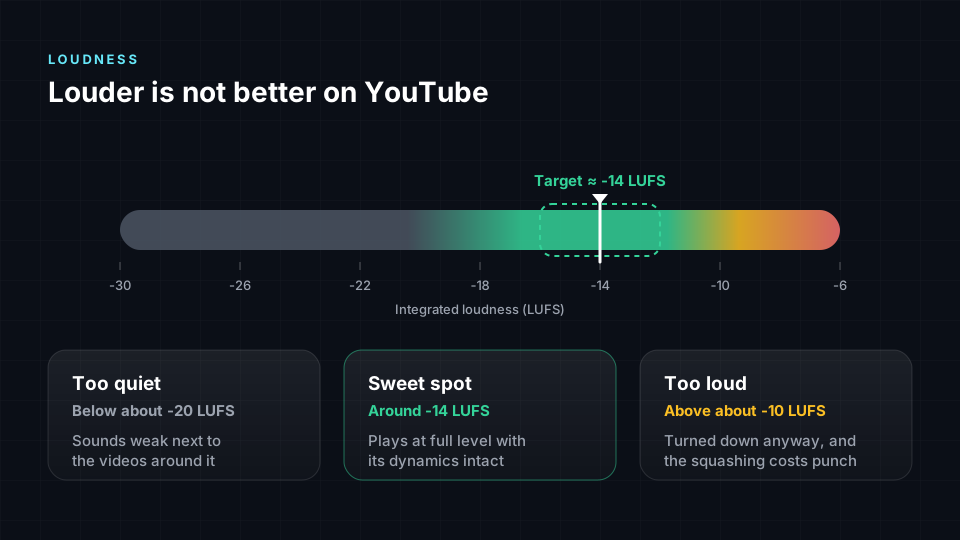
- Too quiet and your video will sound weak next to the videos around it.
- Too loud and YouTube will turn it down anyway, and the heavy limiting you used to get it loud just makes it sound flat.
- Keep peaks below about -1 dB to avoid distortion when the audio is compressed for streaming.
Step 6: Add a sense of space
11. Use reverb to put voices in the scene
A touch of reverb that matches the location makes voiceovers and dialogue sound like they belong in the picture. A cathedral should sound big. A car should sound close and dry.
12. Go immersive with Eclipsa Audio
Everything so far is about making stereo sound better. The next level is to leave stereo behind. Immersive sound places music, ambience and effects all around the viewer, including above, exactly like a cinema.
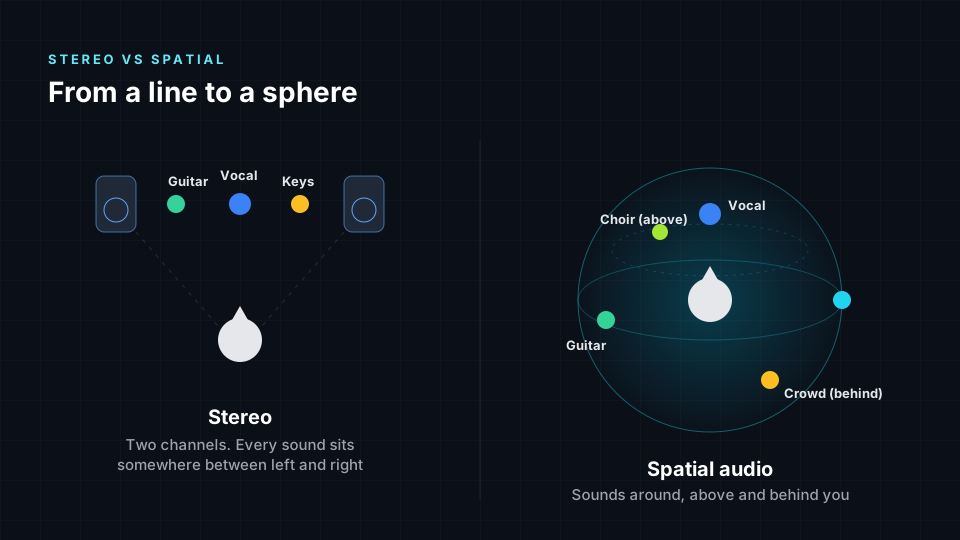
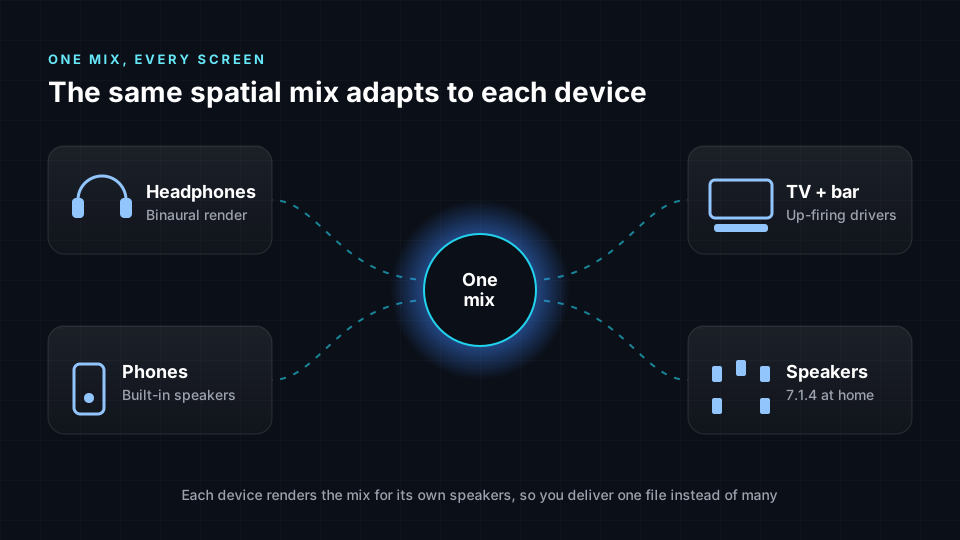
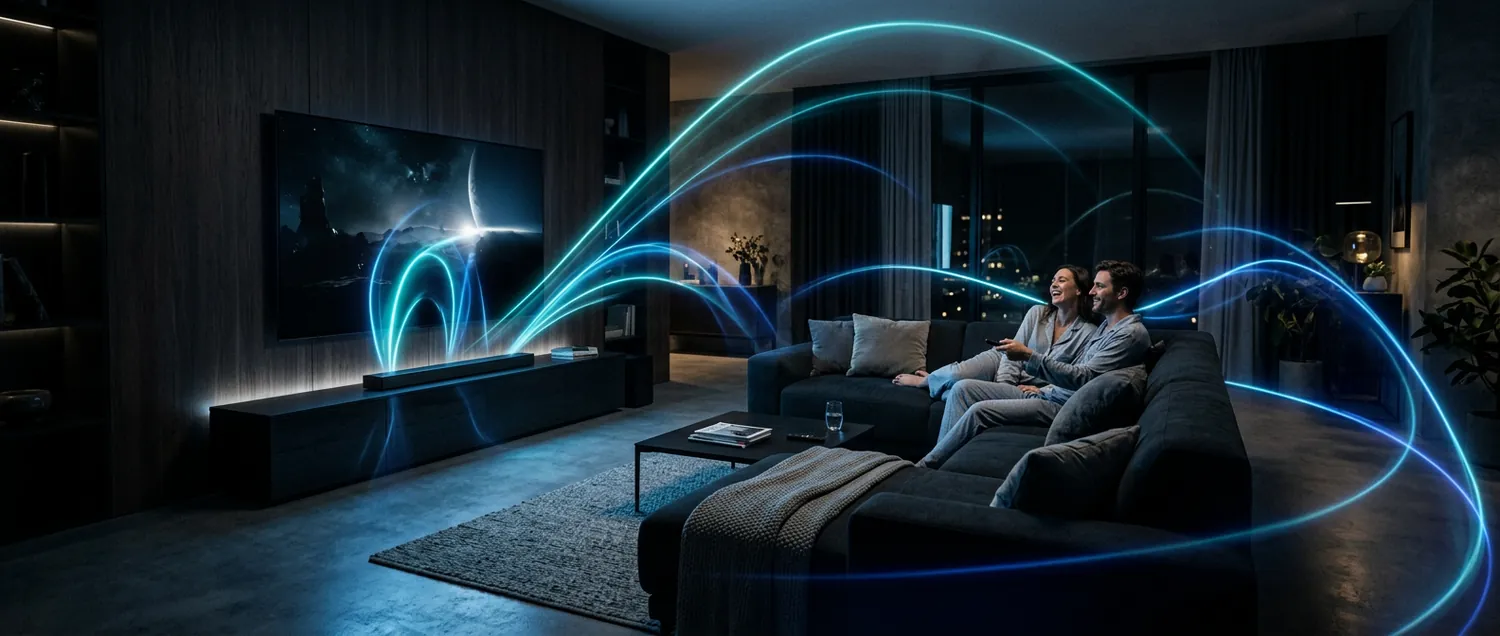
YouTube has accepted uploads with Eclipsa Audio, the open 3D audio format from Google and Samsung, since January 2025. On supported devices, such as Samsung's 2025 TVs and soundbars, your video plays in 3D. On other devices, viewers still hear a normal version, so nobody is left out. Read how to upload and check it in Eclipsa Audio on YouTube.
The spatial audio workflow for video creators
Going immersive is easiest when you plan for it from the start. The workflow is the same whether you make vlogs, music videos, documentaries or gaming content.
13. Keep dialogue, music and effects separate
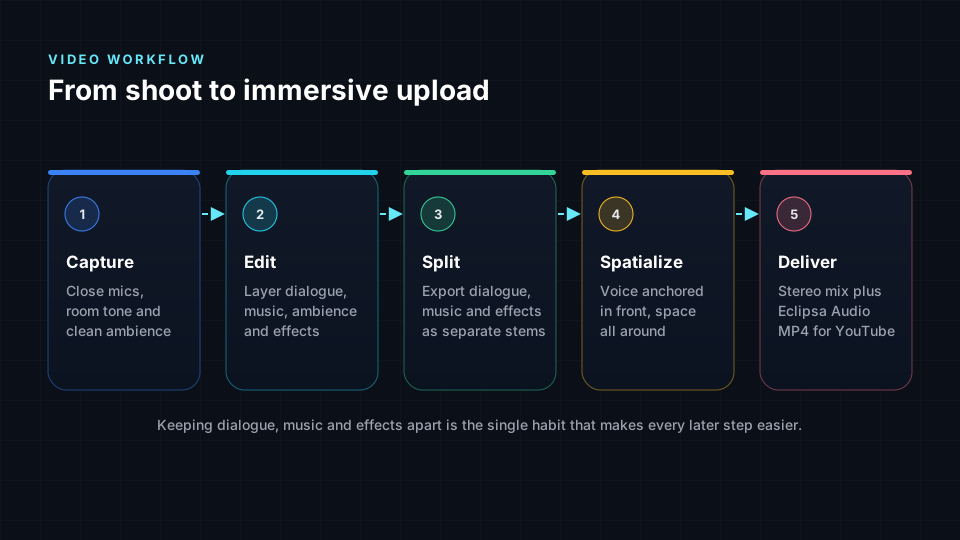
Film studios deliver their soundtracks as three groups, often called DME: dialogue, music and effects. Export your final edit the same way, as three full-length files that start at the same point. Separate groups let a spatial mix keep the voice anchored in front while music and ambience surround the viewer. If you only have a single mixed file, AI separation can still split it, but separate stems give cleaner results.
14. Decide where each layer belongs in 3D
| Layer | Where it usually sits | Why |
|---|---|---|
| Dialogue and voiceover | Front and centre, not moving | Viewers follow the voice and expect it to match the speaker on screen |
| Music | Front and wide, opening up around the viewer | Supports the emotion without fighting the voice |
| Ambience | All around, including slightly above | Makes the location feel real |
| Sound effects | Where the action is, moving with it | Connects sound to what the viewer sees |
| Low end | Centred | Keeps weight and impact solid on every device |
15. Keep movement purposeful
Move a sound when something on screen moves, such as a car passing or a drone flying overhead. Avoid sweeping music around the room for effect. It distracts from the story and can feel like the "8D" effect explained in 8D vs binaural vs spatial audio.
16. Deliver two versions and check both
Keep your stereo mix as the version most viewers will hear, and add an Eclipsa Audio MP4 for viewers on supported devices. Upload privately first, confirm "Eclipsa Audio" appears in the player's Settings on a supported TV, then check the normal version on a phone before you publish.
How Spatial9 helps
- Music videos and visualisers: Spatial9 creates an immersive version of a stereo song, then wraps it in a YouTube-ready MP4 with a branded frame, your cover art or your own video, and can publish straight to YouTube.
- Existing Atmos mixes: convert an ADM BWF master to Eclipsa Audio for free. See how to convert Dolby Atmos to Eclipsa Audio.
- Full video soundtracks: Spatial9's video transformation turns a whole video soundtrack into Eclipsa Audio without audio engineering knowledge. It is in invite-only early access, and catalog transformation for whole channels is coming soon.
New to 3D sound? Start with our guide to spatial audio and stereo vs immersive sound.
Cinematic audio checklist
- Microphone close to the speaker, in a quiet, soft room
- Room tone recorded for every location
- Gentle noise reduction, EQ and compression on dialogue
- Music, ambience and sound effects layered under the voice
- Music ducked whenever someone speaks
- Mix checked on phone speakers and earbuds
- Loudness around -14 LUFS, peaks below -1 dB
- Reverb that matches each location
- Dialogue, music and effects exported as separate full-length stems
- An immersive Eclipsa Audio version, verified on a supported device before publishing
Frequently asked questions
How do I make my YouTube audio sound professional?
Record close to the microphone in a quiet room, clean the dialogue gently, layer music and ambience under the voice, keep the voice on top, and master to around -14 LUFS.
What loudness should YouTube videos be?
Around -14 LUFS integrated, with peaks below about -1 dB. YouTube turns louder videos down, so going louder only costs dynamics.
What makes sound cinematic?
Clear dialogue, layered ambience and effects, music that supports the emotion, real dynamics between quiet and loud moments, and a sense of space around the viewer.
Does YouTube support spatial audio?
Yes. YouTube accepts videos with Eclipsa Audio, an open immersive format, and viewers on supported devices hear the sound in 3D. YouTube has also long supported spatial audio for 360 and VR videos.
Do I need expensive gear for cinematic sound?
No. A good, affordable microphone placed close to the speaker matters far more than expensive equipment. Most cinematic sound comes from layering and mixing in the edit.
How do I add spatial audio to a YouTube video?
Keep dialogue, music and effects as separate stems, place them in 3D or let Spatial9 do it, export an MP4 with an Eclipsa Audio track, and upload it. Check playback on a supported TV before making it public.
Can I add 3D sound to my music videos?
Yes. Spatial9 creates an immersive version of your song and turns it into a YouTube-ready video with your cover art or footage, ready to publish.
Sources
- Introducing Eclipsa Audio: immersive audio for everyone, Google Open Source Blog, January 2025. YouTube uploads and Samsung's 2025 TVs.
- Introducing Open Source DAW Plugin for Eclipsa Audio, Google Open Source Blog, June 2025. YouTube support since January 2025 and how to verify playback.
- Recommendation ITU-R BS.1770, International Telecommunication Union. How loudness in LUFS is measured. YouTube does not publish an official loudness target; the figure of around -14 LUFS comes from widely reported measurements.
Make your next video sound like a film
Start with clean dialogue and smart layers, then take the final step into 3D. Try Spatial9 free and create an immersive, YouTube-ready version of your next music video.