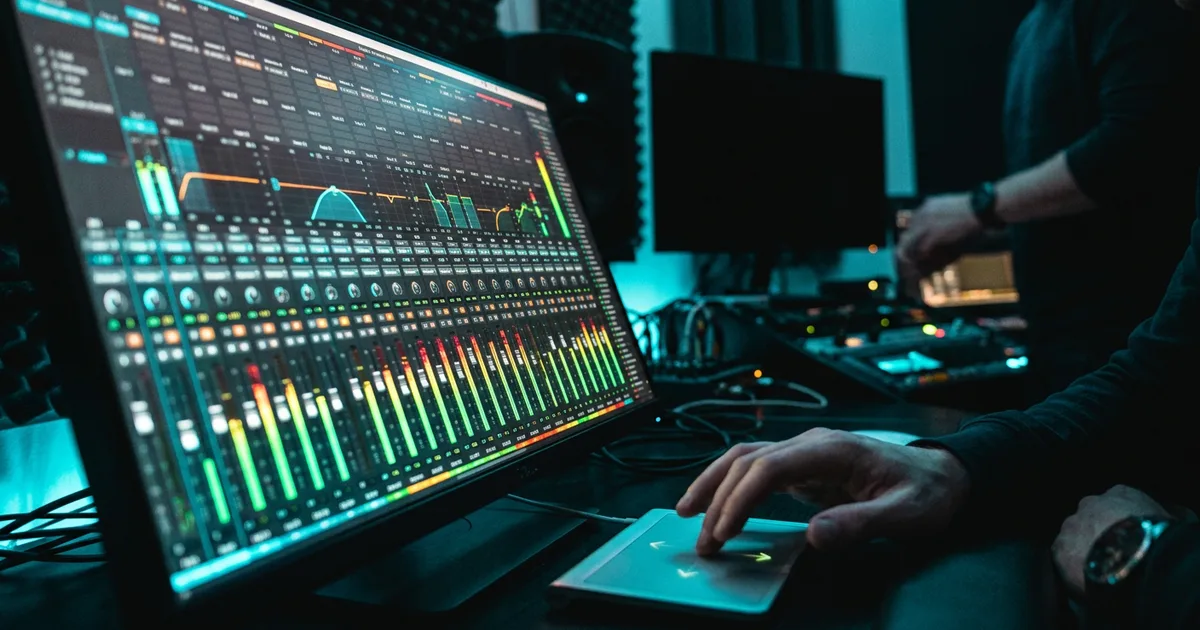
Mix Console, Meters and Clarity in Immersive Audio
Spatial9 Team · · 7 min read
Lesson 10 of 24 in Spatial9 Academy, module 3: Inside the Immersive Classroom. Practice in the demo: Music Transformation.
Key takeaways
- The Mix Console shows stems and the twelve 7.1.4 speaker channels, with stem faders from -60 to +6 dB and channels capped at 0 dB.
- Meters show RMS and peak in dBFS, hold peaks for 1.6 seconds and light a clip warning at -0.1 dBFS; there is no LUFS meter.
- Masking risk in the classroom equals spectral overlap times spatial closeness, so moving clashing stems apart reduces it.
- Auto Ducking dips other stems by up to 12 dB, and Hearing Compensation adapts playback to your ears from a test or an audiogram.
Placement tells the listener where a sound is. Level tells them how important it is. In an immersive mix these two ideas are tied together: a sound placed close and loud dominates, while a sound placed far and quiet becomes atmosphere. In Classroom Lab 1 you learned to place sound. Now you will learn to balance it and keep it clear.
What you will learn
- How the Mix Console works in its Stems and 7.1.4 Channels views.
- How to read RMS, peak hold and the clip light.
- How to use the Frequency Spectrum to see each stem.
- What masking is, and how spatial distance reduces it.
- How Auto Ducking makes room for an important sound.
- How Hearing Compensation and the Parametric EQ adapt the mix to your ears.
The Mix Console
Open the Mix Console panel. It has two tabs: Stems and 7.1.4 Channels.
The Stems tab shows one strip per stem, with its number and name. Stereo stems carry an "ST" tag. Each strip has M for mute and S for solo. When you solo a stem, the others dim so you can see what you are hearing. The Unity button resets every stem volume at once, which is a lifesaver after an experiment goes too far.
The 7.1.4 Channels tab shows twelve channel strips, one per speaker. The four height channels carry a TOP tag and the LFE is labelled "Subwoofer". This view answers a different question: not "how loud is the pad?" but "how loud is the rear left speaker?".
Faders
Stem faders run from -60 dB to +6 dB. Channel faders and the Master fader stop at 0 dB, so you cannot push the final output above full scale. A few habits make the faders fast:
| Action | Result |
|---|---|
| Double-click a fader | Return to 0 dB |
| Up / Down arrow | Move 1 dB |
| Shift + arrow | Move 0.1 dB |
| Home | Jump to 0 dB |
Reading the meters
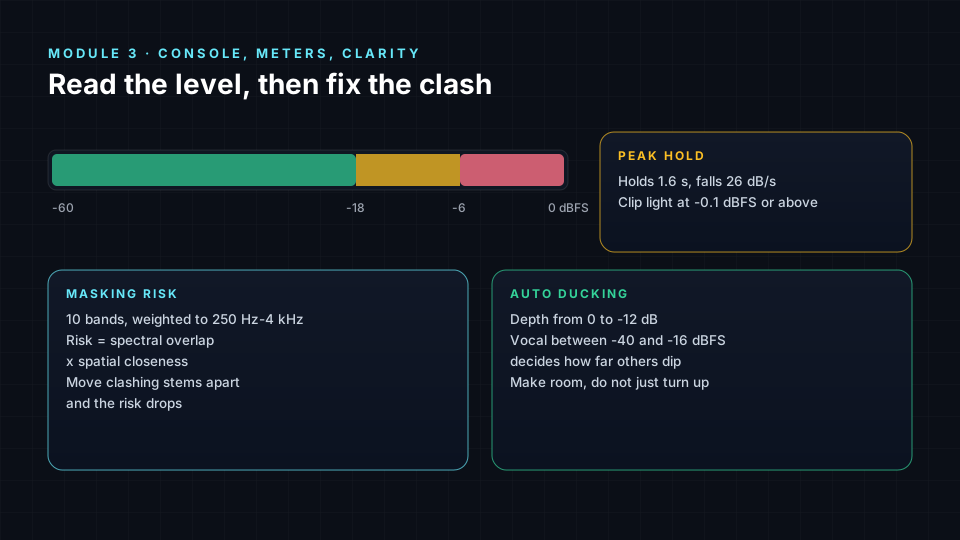
Each strip has a meter that shows two things at once: RMS, the average energy you perceive as loudness, and peak, the highest instantaneous level. The scale runs from -60 to 0 dBFS, where 0 dBFS is the digital ceiling.
The colours are a guide, not a rule:
- Green, -60 to -18 dBFS: comfortable working level for most stems.
- Yellow, -18 to -6 dBFS: loud, typical for a lead or the master during a chorus.
- Red, -6 to 0 dBFS: close to the ceiling. Fine for short peaks, risky if constant.
Peaks are held for 1.6 seconds and then fall at 26 dB per second, so you can catch a short transient. The peak readout at the top of each strip shows the highest value so far, or "-inf" for silence. Click it to reset. The clip light turns on at -0.1 dBFS or above. If it lights on the Master, pull the Master or the loudest stems down.
The console footer says it plainly: "Meters show true dBFS level with peak hold. Double-click a fader to return to 0 dB." Note what is missing: there is no LUFS loudness meter in the classroom. Judge overall loudness by ear and with the A/B switch, and leave loudness targets for your delivery tools.
Seeing frequency: the spectrum
Open Waveform & spectrum and expand the Frequency Spectrum. It draws a curve for every stem plus a Mix total with peak hold, across 20 Hz to 20 kHz on a logarithmic scale, from 0 to -84 dBFS, in 72 bands. Hover a stem chip in the legend to highlight its curve. Move the crosshair to read the exact frequency and level.
Use the spectrum to answer questions such as: Which stems share the 200 to 400 Hz area with the Reese Bass? Does the Synth Lead own the 2 to 4 kHz region in the chorus? Summary tiles show Length, Tempo, Key and Stems, and the waveform lets you "Click the waveform to jump anywhere".
Masking and spatial unmasking
Masking happens when two sounds share the same frequencies at the same time and one hides the other. In stereo, the usual fixes are EQ cuts or level changes. Immersive audio gives you a third tool: space.
Turn on Frequency Masking in the Clarity group of the Controls menu ("Spot sounds that clash"). The classroom analyses ten bands, weighted toward 250 Hz to 4 kHz, where the ear is most sensitive. For every pair of stems it calculates a risk:
The top clashing pairs appear as a "Frequency Collision" report. Because closeness is part of the formula, moving two clashing stems apart on the Sphere lowers their risk. This is called spatial unmasking: your brain separates sounds more easily when they come from different directions.
Try it. Find a clashing pair in the report, solo both, and slowly increase the angle between them on the Sphere. You will hear each one come forward before the report updates.
Auto Ducking
Sometimes one sound must win, at least for a moment. Auto Ducking ("Make room for clashing sounds") lowers the other stems when an important one is active. The Depth control runs from 0 to -12 dB in 0.5 dB steps. The vocal level between -40 dBFS and -16 dBFS drives how much the other stems dip: the louder the vocal, the deeper the dip, up to your chosen depth.
Use ducking gently. Two to four decibels is often enough to clear space without the listener noticing the pump. Deep ducking can be a creative effect, but it should be a choice.
Tune the room to your ears
Everyone hears differently, and immersive cues depend on fine detail. The Settings group has two tools for this.
Hearing Compensation runs a hearing test from 125 to 8,000 Hz for each ear, in dB HL. You choose a hearing type: No loss, Conductive, Sensorineural, Mixed or Other. The classroom can also read an uploaded audiogram image. You can Retake hearing test at any time. It adapts playback to your ears. Class share links never carry it, because they only save positions and movements.
The Parametric EQ gives you a Preamp and bands with Frequency, Gain and Q Factor, plus Reset to flat. Use it to correct your headphones, not to mix. There is also a headphone profile selector and a Performance setting (Auto, High, Mid, Low) if your computer struggles.
Lab steps
- Press Unity. Play the chorus and note the Master peak.
- Solo Reese Bass and Pad. Read their curves on the spectrum. Where do they overlap?
- Turn on Frequency Masking. Write down the top clashing pair.
- Move that pair 60° further apart on the Sphere. Did the risk fall? Did you hear it?
- Turn on Auto Ducking at -3 dB, then at -10 dB. Describe the difference in one sentence each.
- Open the 7.1.4 Channels tab. Which speaker peaks highest in the drop?
Check yourself
- What range do stem faders cover?
- What do the RMS and peak parts of a meter tell you?
- At what level does the clip light turn on?
- What two factors make up masking risk in the classroom?
- Is Hearing Compensation part of a Share with class link?
Answers
- From -60 dB to +6 dB.
- RMS shows average energy close to perceived loudness; peak shows the highest instant level.
- At -0.1 dBFS or above.
- Spectral overlap and spatial closeness.
- No, share links only carry positions and movements.
Assignment
Produce a one-page "clarity report" for Echoes. List the three worst clashing pairs, what you changed for each (position, level or ducking), the before and after risk, and one sentence on what you heard. Include a screenshot of the spectrum.
Frequently asked questions
Does the classroom have a LUFS loudness meter?
No, the classroom meters show RMS and peak in true dBFS with peak hold, so overall loudness is judged by ear and with the A/B comparison.
What is spatial unmasking?
Spatial unmasking is the way the brain separates two sounds more easily when they come from different directions, so moving clashing stems apart reduces masking without EQ.
How deep should Auto Ducking be?
Two to four decibels usually clears space without an audible pump, while deeper settings up to -12 dB become a deliberate creative effect.
Will Hearing Compensation affect what my classmates hear?
No, a Share with class link only carries stem positions and movements, so your personal hearing settings stay on your own device.
Next step
Your mix is placed, balanced and clear. Now make it move with intent in Movement Design: Make Every Spatial Motion Mean Something, or return to the Spatial9 Academy course home.
The full lesson is free with a Spatial9 account.